Most small business websites get the same questions every day: how much, when are you open, do you deliver, where are you. If you answer them by phone or WhatsApp, a chatbot on your website can take most of them, day and night.
This guide shows how to add one that answers from your own website, so it gives your real prices and opening hours instead of guesses. You don't need to write code: the only code is one line you paste into your site at the end, and there are steps for WordPress, Shopify and Wix.
How a chatbot can answer from your website
You've probably used ChatGPT. It knows a lot about the world, but nothing about your business: ask it your prices and it will either say it doesn't know or make something up.
A chatbot that answers from your website works in two steps. When a customer asks a question, it first searches your pages for the parts that answer it, then gives only those parts to an AI model, which writes a short answer from them. If your pages don't cover the question, it says so instead of guessing. (If you want the technical side, I wrote about how that search works and the four fixes that made it find the right answer.)
That means a chatbot is only as good as the pages it reads. If your prices are on your website, it can give them. If they're only in your head, it can't.
Step 1: give it your website
In BusinessChat, open Builds and click Build from a website. Paste your home page's address (or the page for one branch, if you have several) and choose My business's.
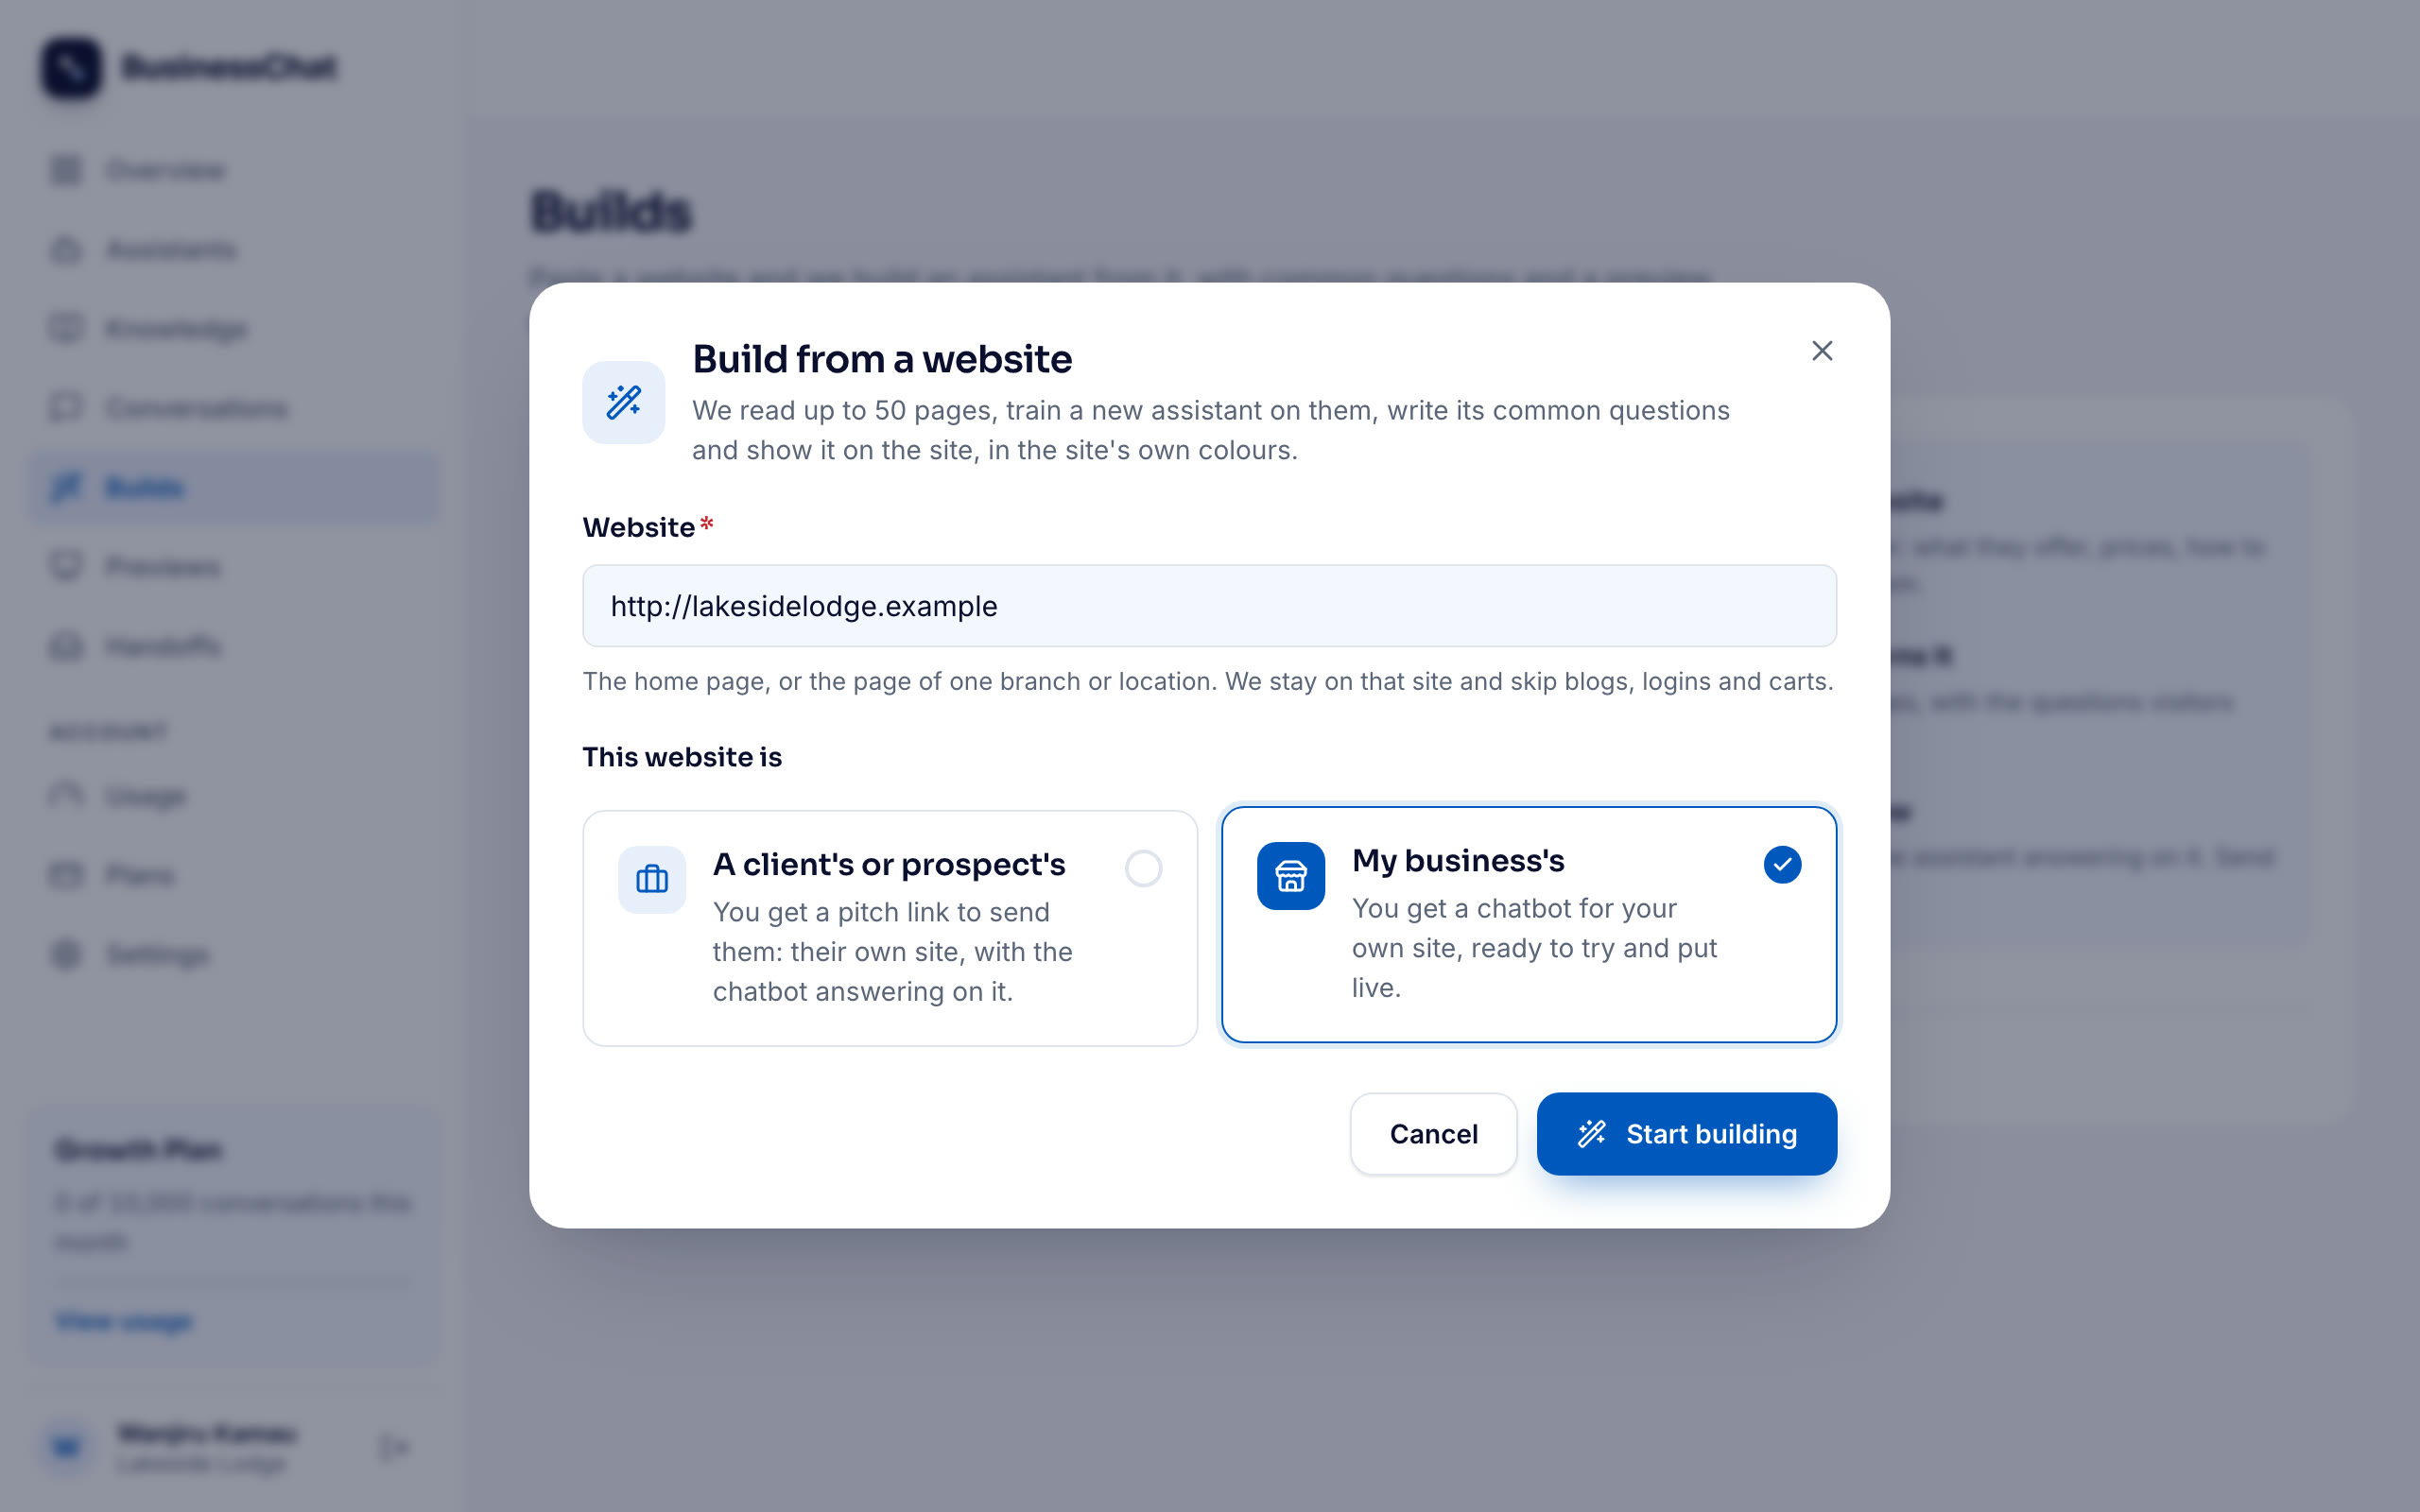
Click Start building. It reads the pages on your site, skipping blogs, logins and shopping carts, and you can watch their titles appear as it goes. The free trial reads up to 15 pages, which covers most small business sites; paid plans read 30 or 50.
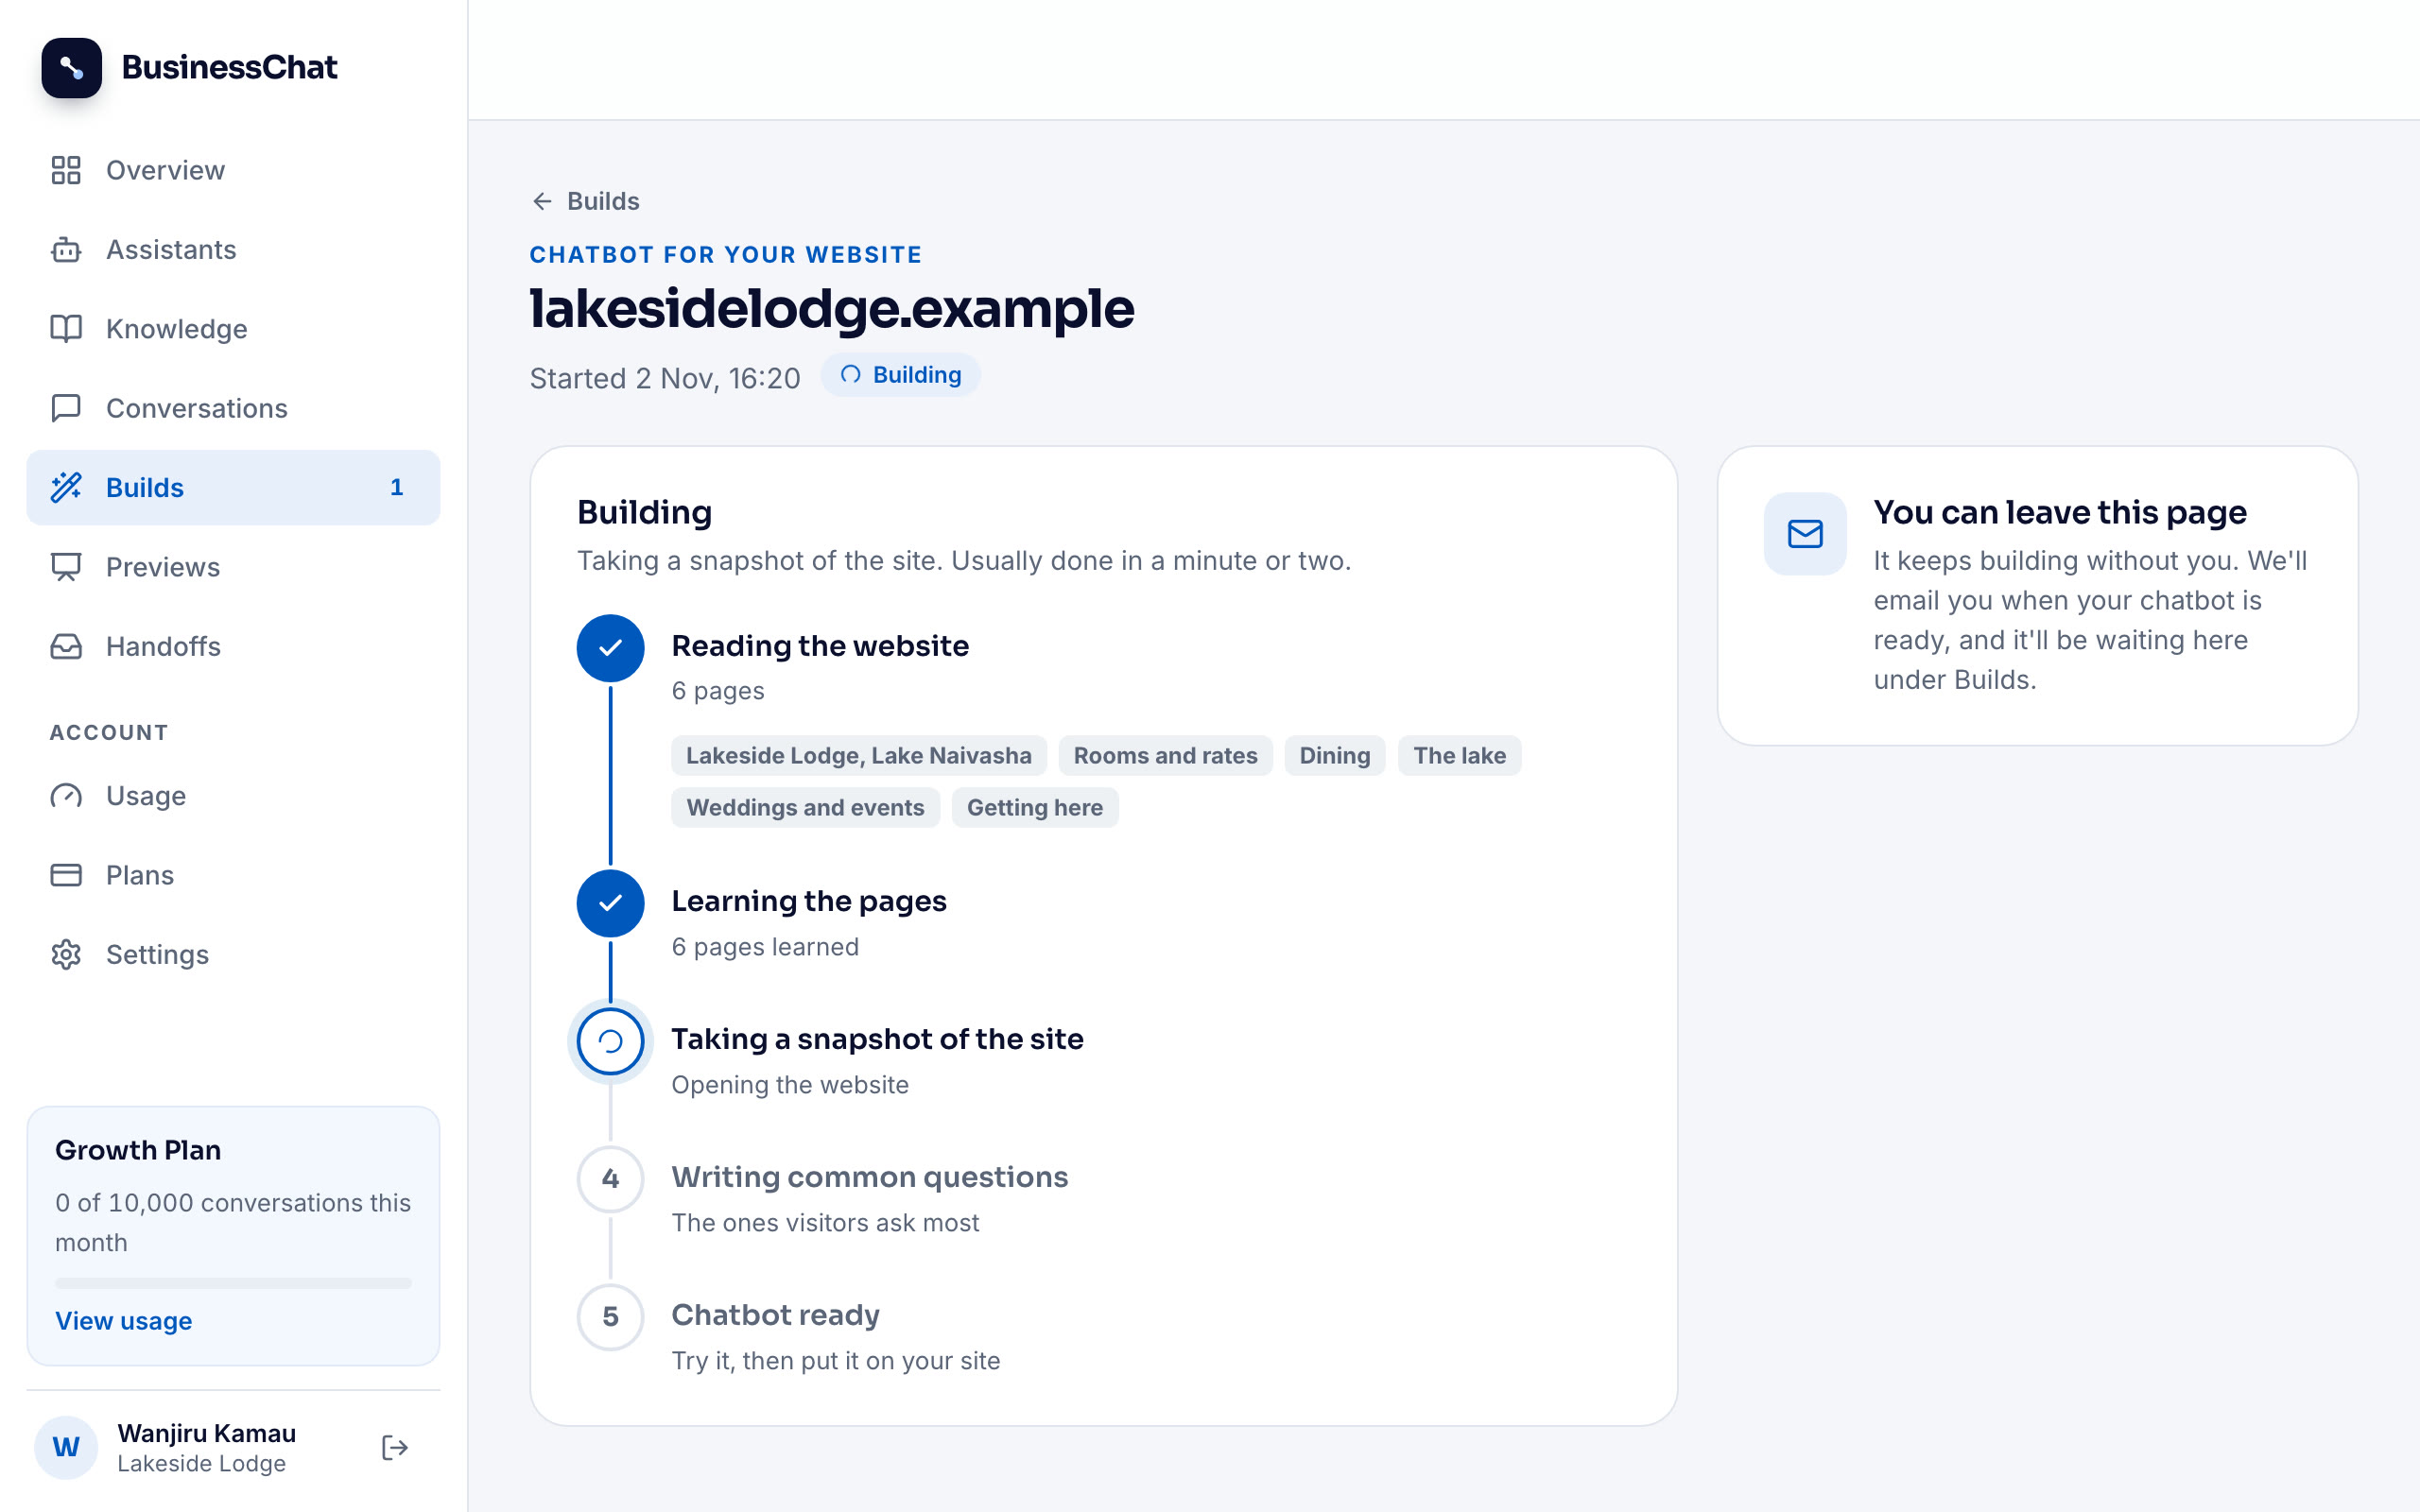
While it works, it also writes up to six questions your visitors are likely to ask (they show as buttons when a chat starts) and names the chatbot after your business. On a paid plan it dresses the chat window in your site's own colours and fonts. It's usually done in a minute or two, and you get an email when it's ready, so you can close the page.
Step 2: ask it what your customers ask
Click Try your chatbot and ask the questions you get every week. Write them the way customers do, short and a bit messy: "how much for a room", "are you open sunday", "do you deliver to Westlands".
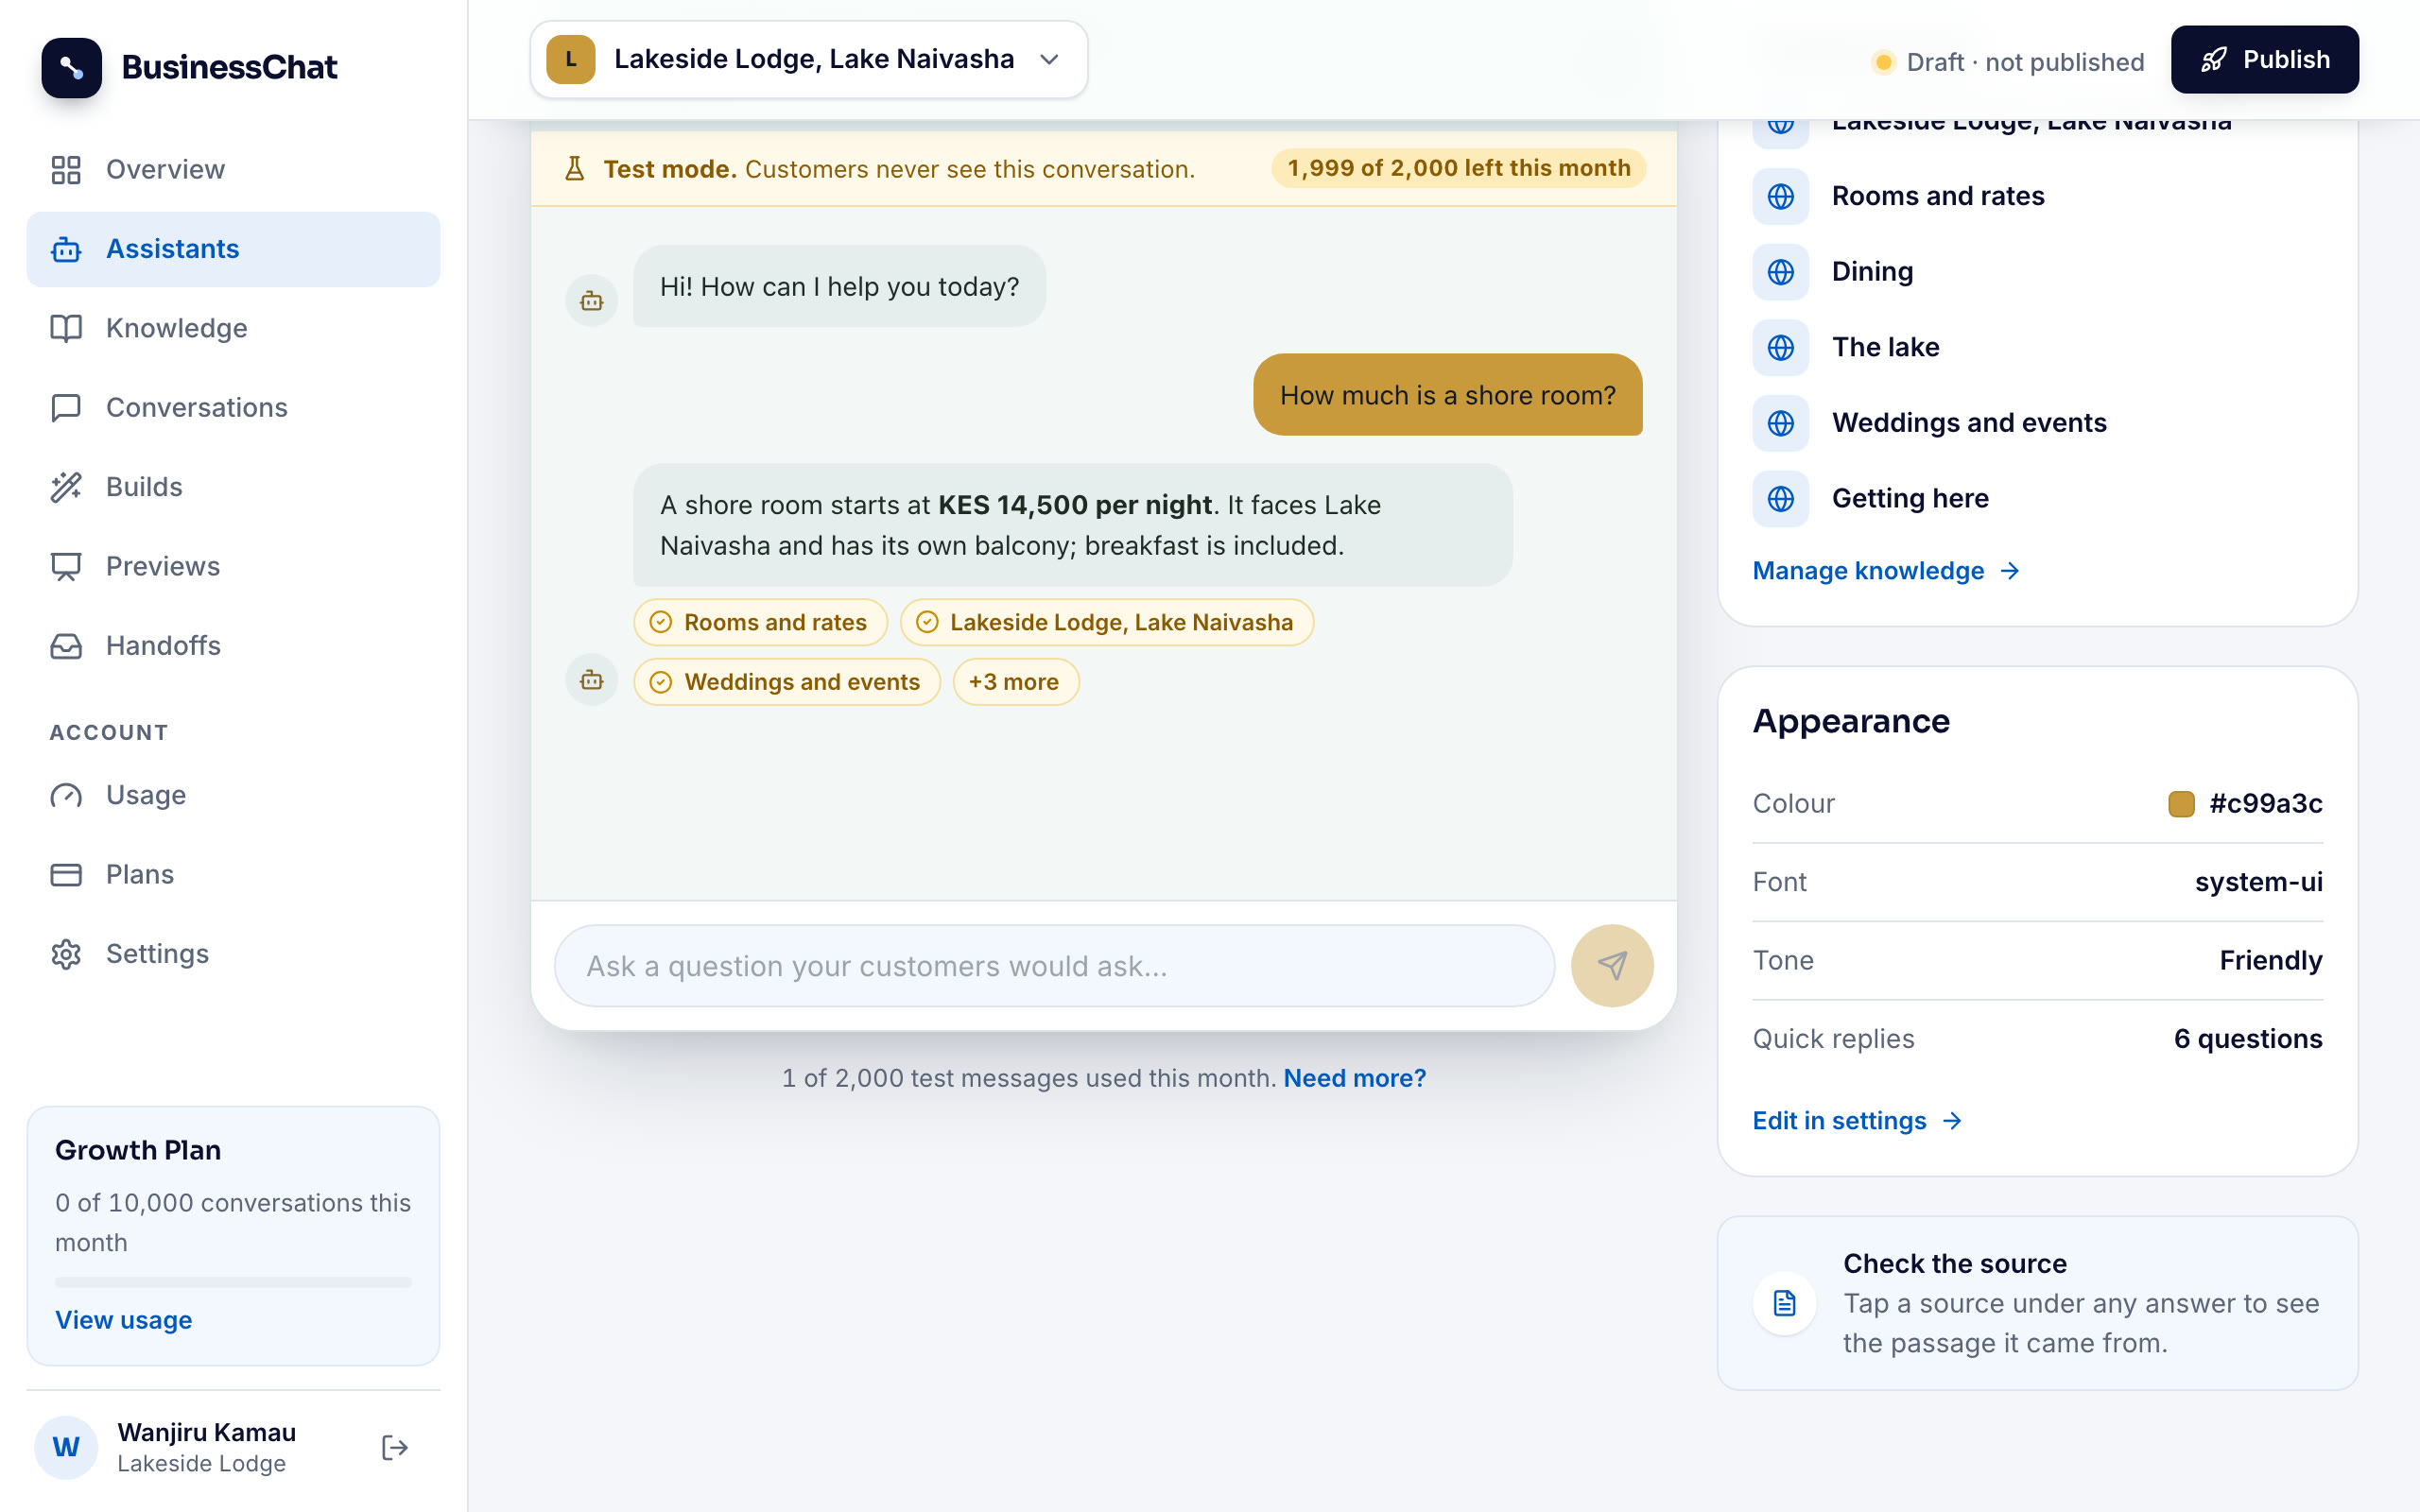
Each answer shows which page it came from, so you can check it. If an answer is wrong or missing, the fix is usually in your content:
- The answer isn't on your website. Add it to the page where it belongs, or add a document with it under Knowledge. A price list or a guest guide as a PDF or Word file works well.
- The answer is in a picture. A price list posted as an image can't be read. Put it on the page as text, or add it as a document.
- Two pages disagree. If an old page still shows last year's prices, the chatbot may find it. Remove or update the old page.
Step 3: decide what it says when it doesn't know
Every chatbot will get questions your pages don't answer. A good one says so; a bad one makes something up, and a made-up price or promise can cost you a customer. Try it: ask about something you don't offer.
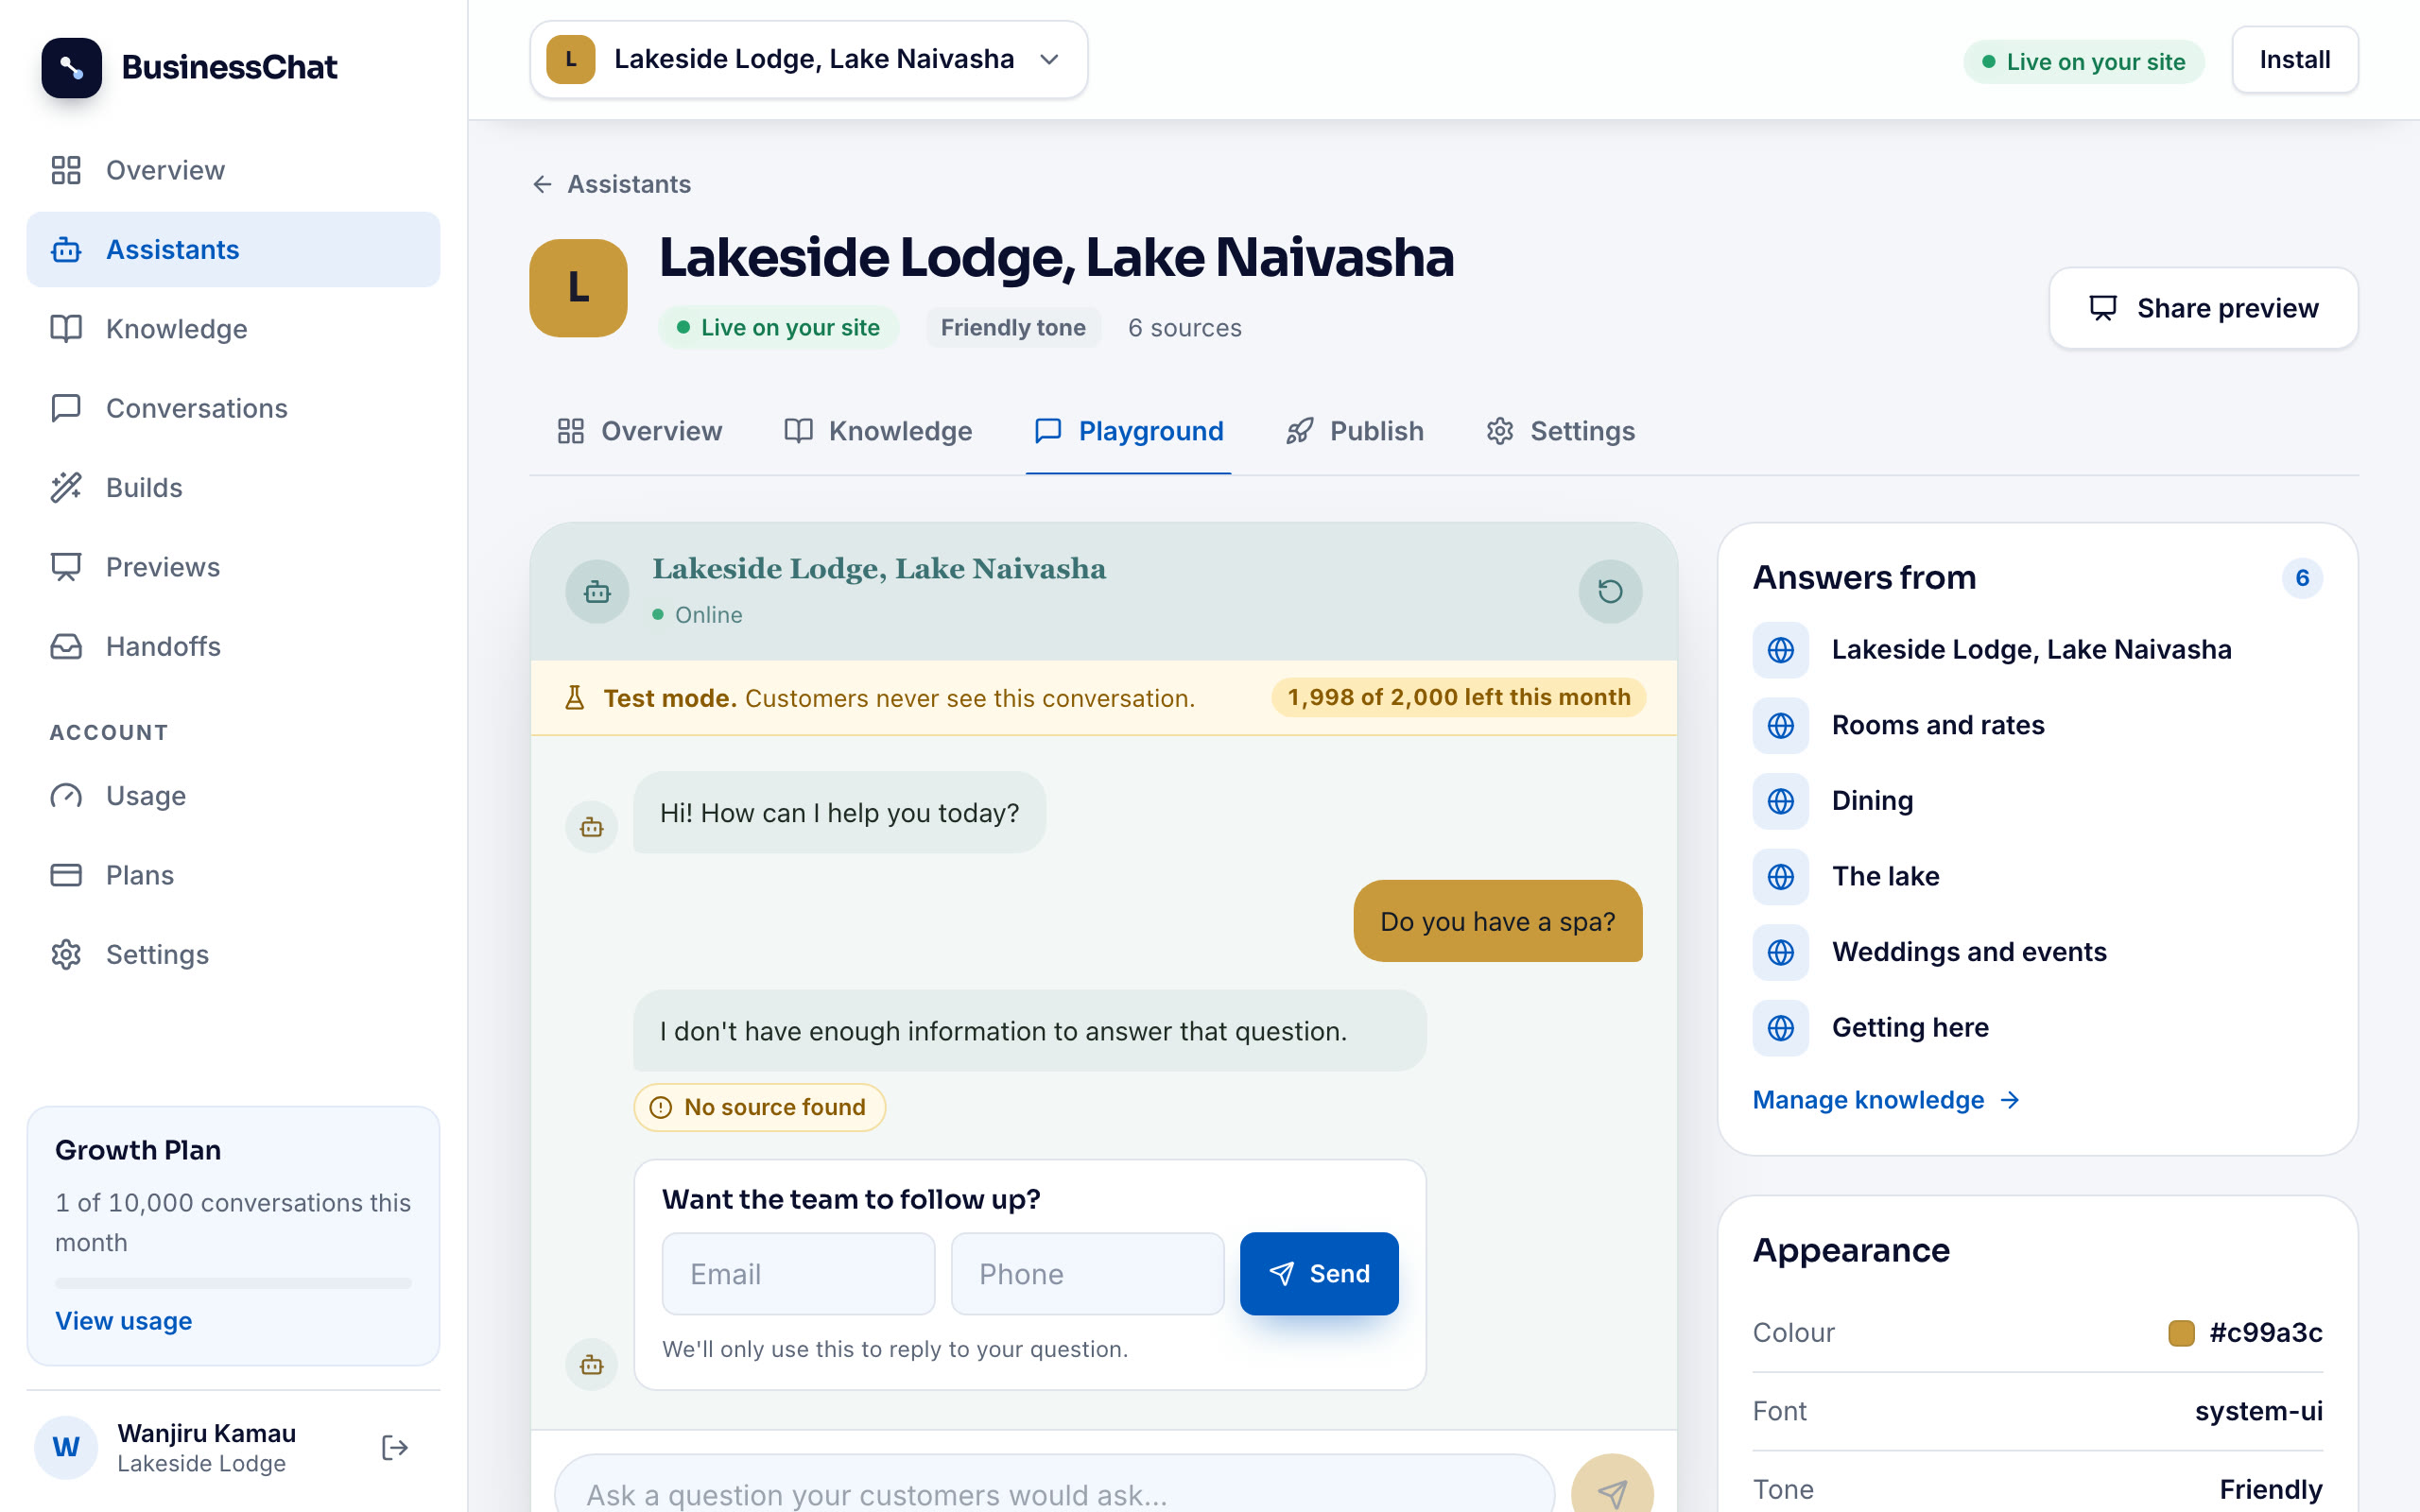
Under Settings, the card When your assistant can't answer sets what happens next. You write the reply it sends when it doesn't know, and a separate one for questions that have nothing to do with your business (like the weather). Then switch on Offer a follow-up and choose how visitors reach you:
- Form: the visitor leaves an email or phone number, and it shows up in Handoffs for you to reply.
- WhatsApp: the visitor gets an "Ask us on WhatsApp" button that opens a chat with your number, their question already typed in.
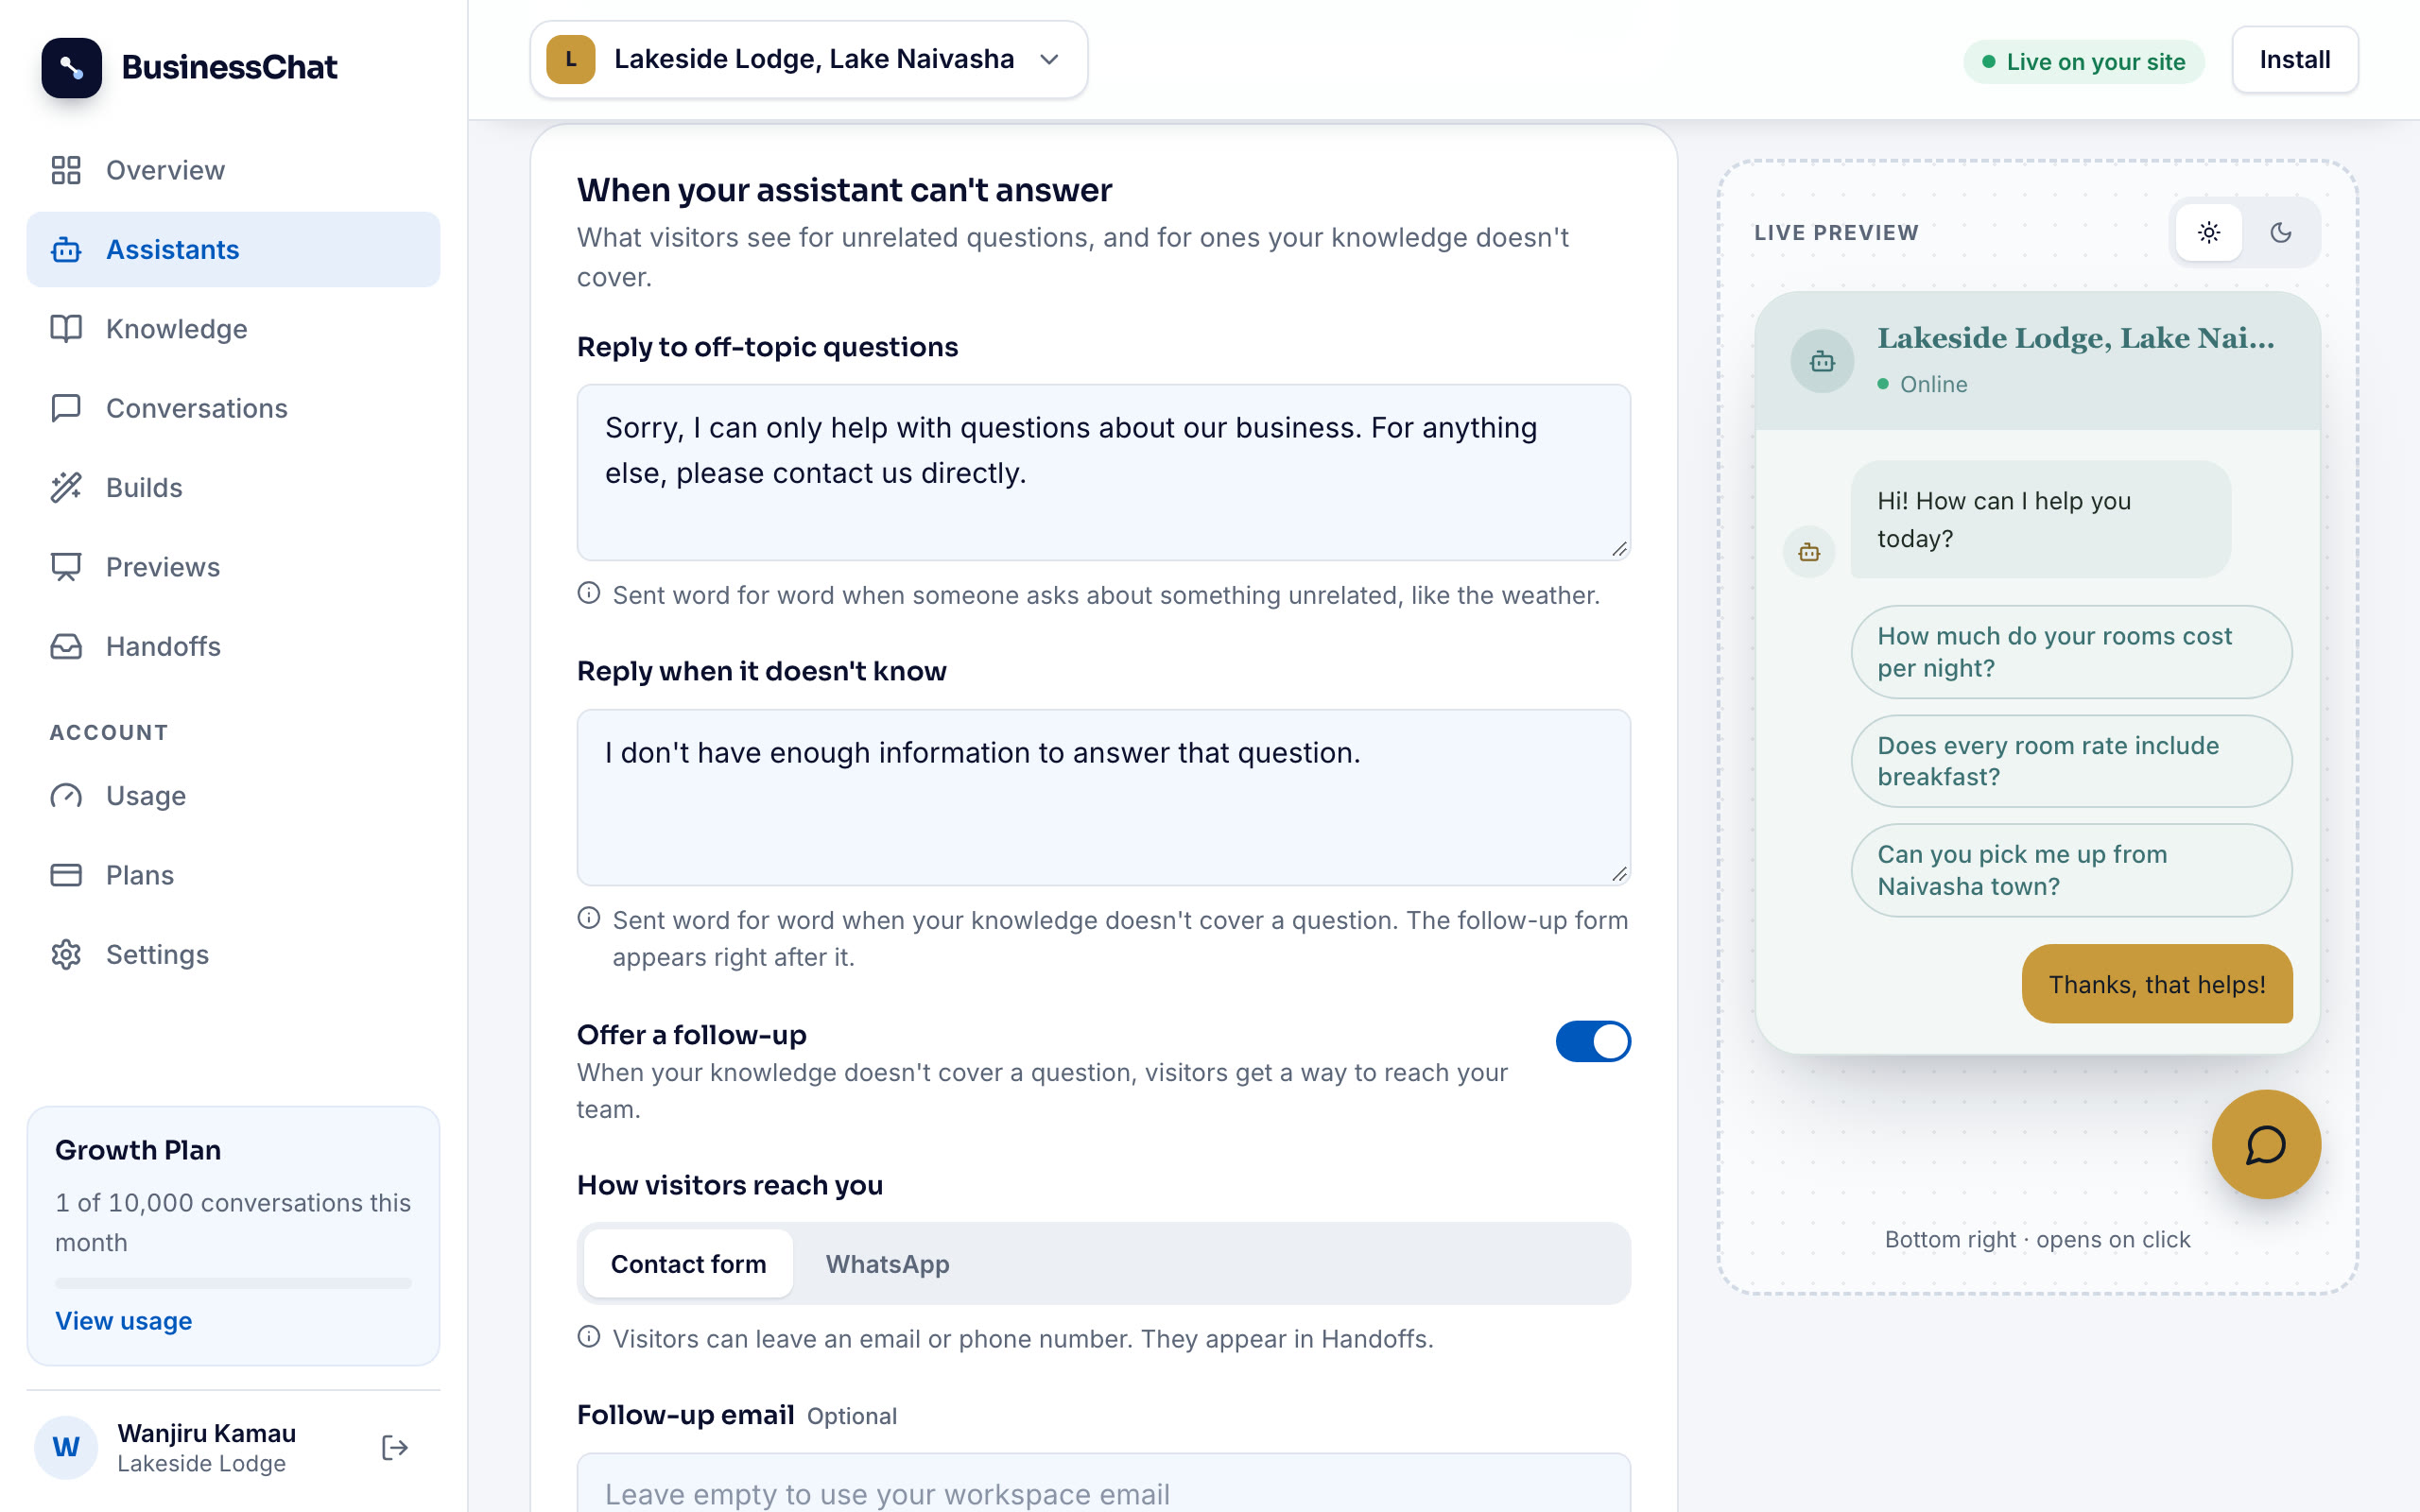
The questions it couldn't answer are also listed on its Overview page under Content gaps. Read them once a week: each one is something your customers want to know that your website doesn't say yet.
Step 4: put it on your website
When you're happy with the answers, open the Publish tab. First add your website's address as a trusted domain, for example yourbusiness.com. Without one, the chat window won't load on any site. Then click Publish and copy the install code.
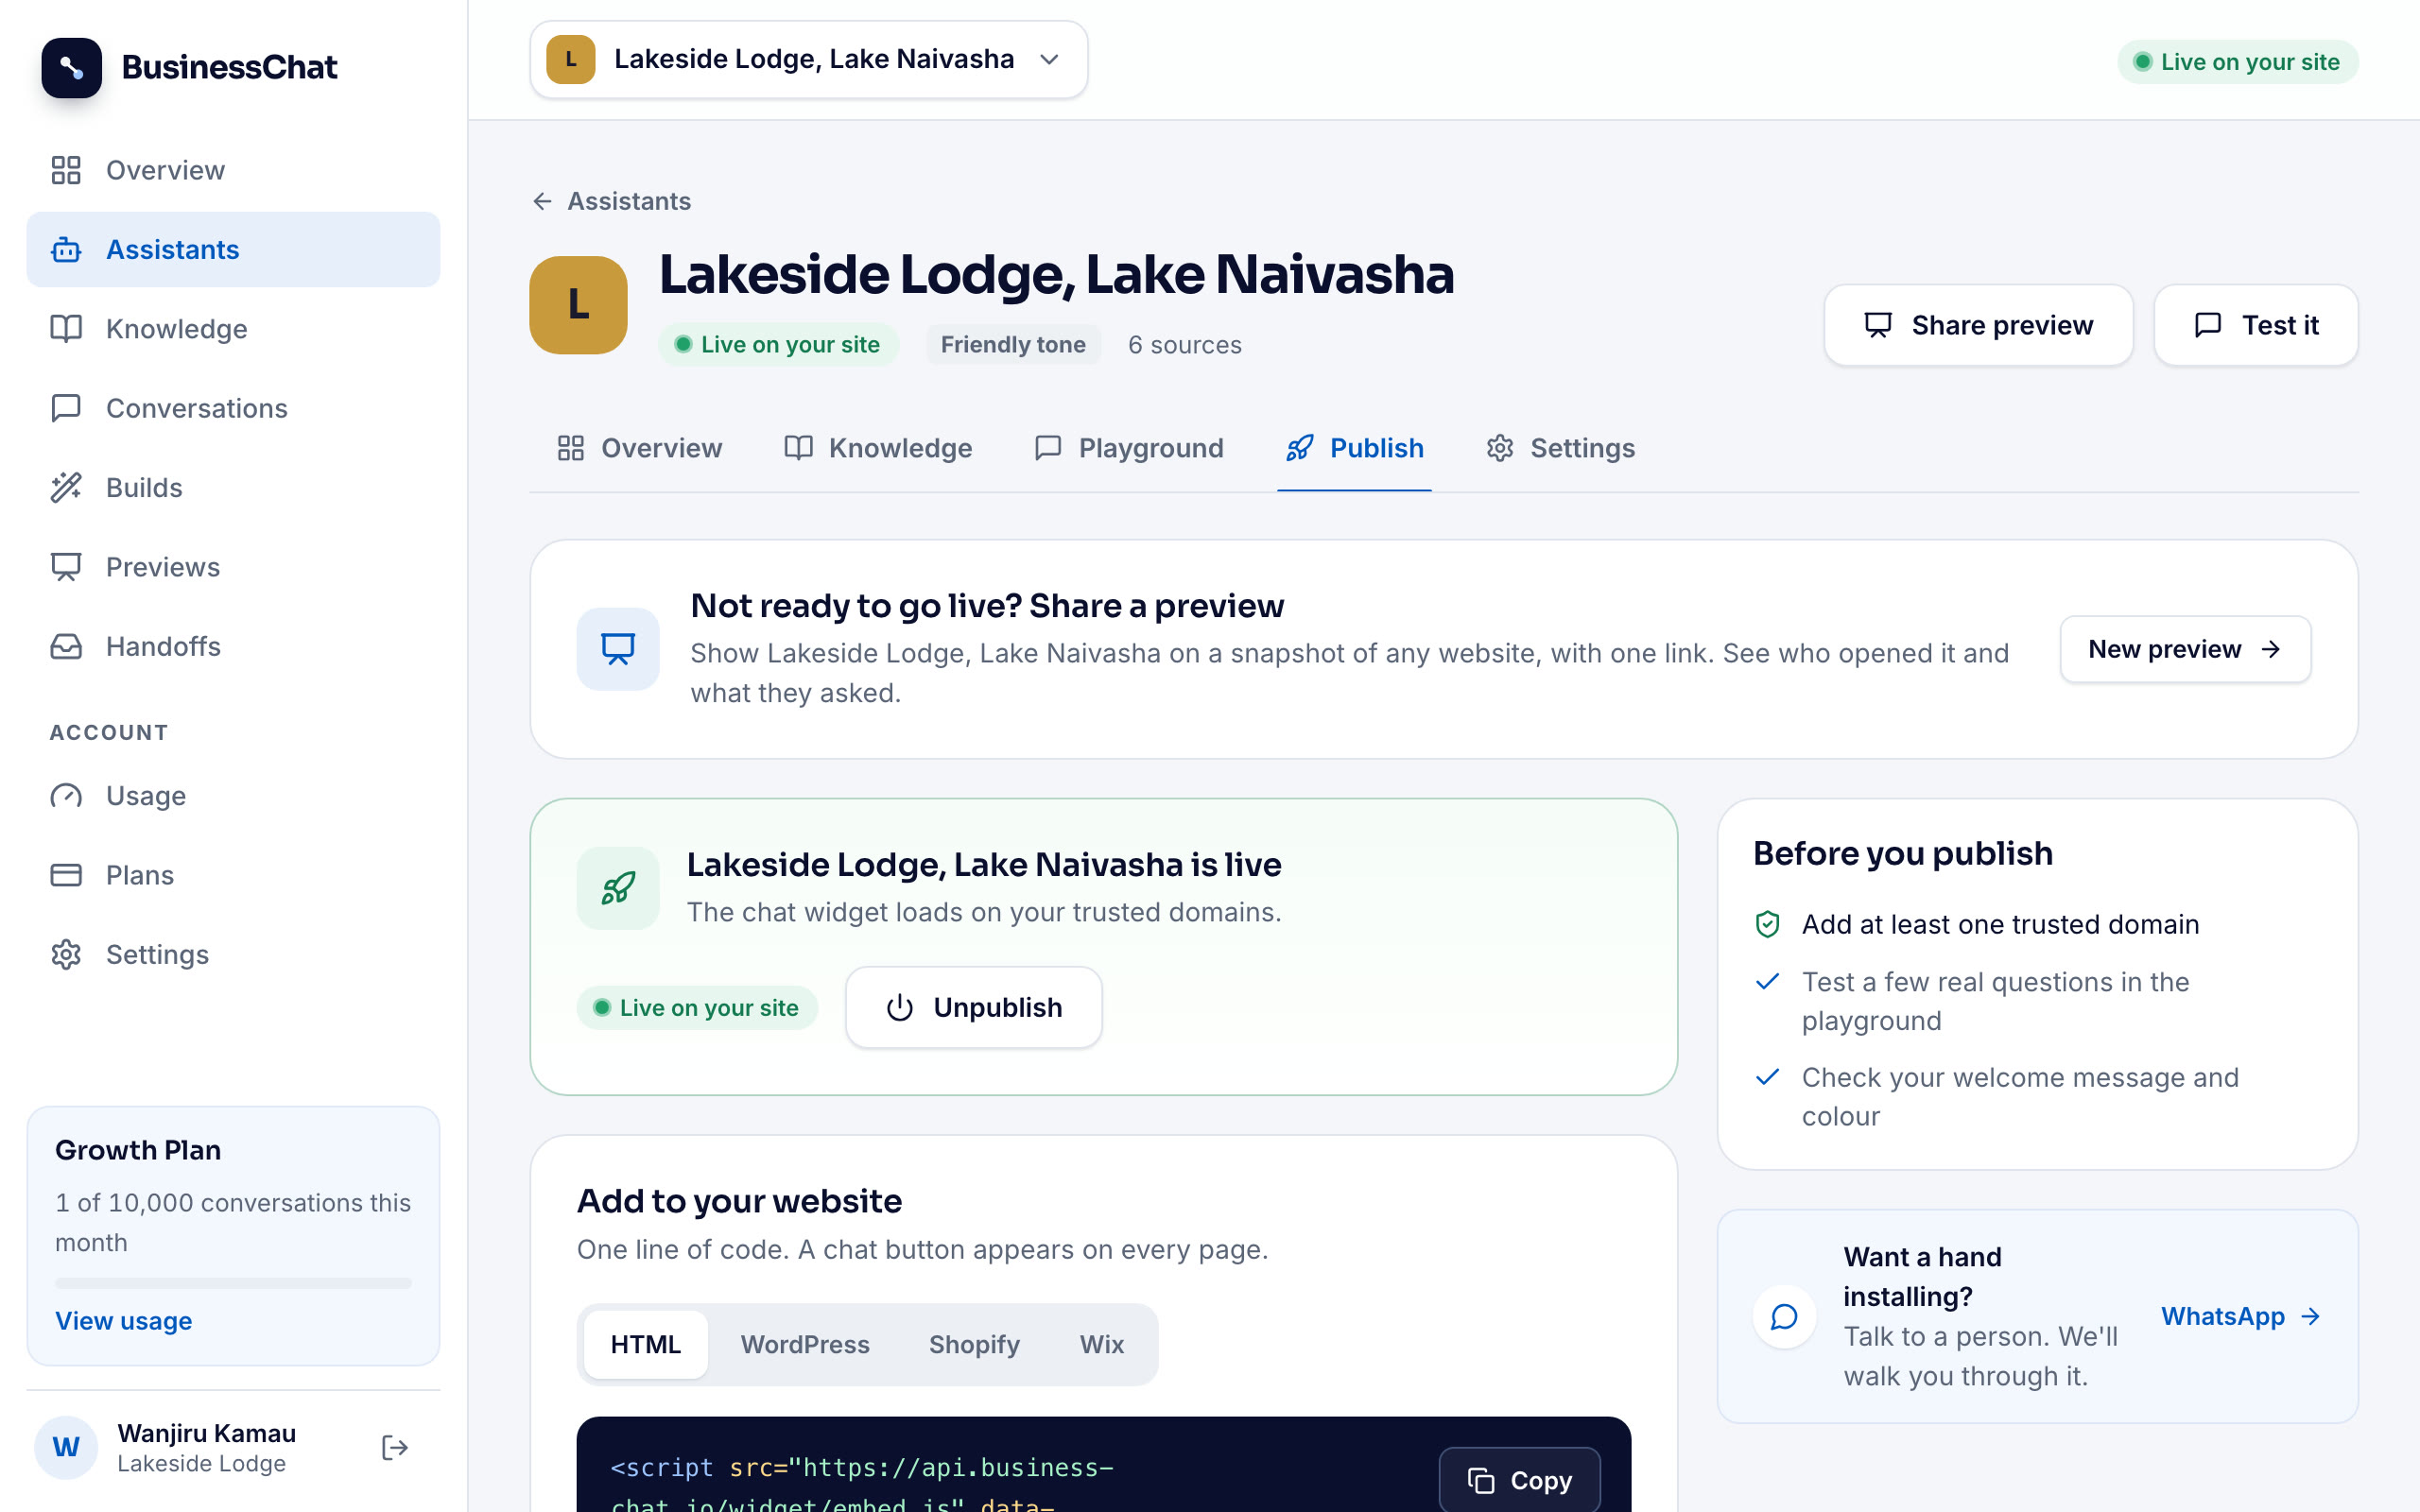
Where the code goes depends on how your website was made. The steps are next to the code in the app:
- WordPress: go to Appearance → Theme File Editor (or use a header and footer plugin), paste the code into the footer before
</body>, then update the file and reload your site. - Shopify: go to Online Store → Themes → Edit code, open
theme.liquidand paste the code before</body>. Save, then preview your store. - Wix: open Settings → Custom code, add custom code, paste it and apply it to all pages in the "Body - end" position.
- Any other site: paste it just before the closing
</body>tag of your site's template.
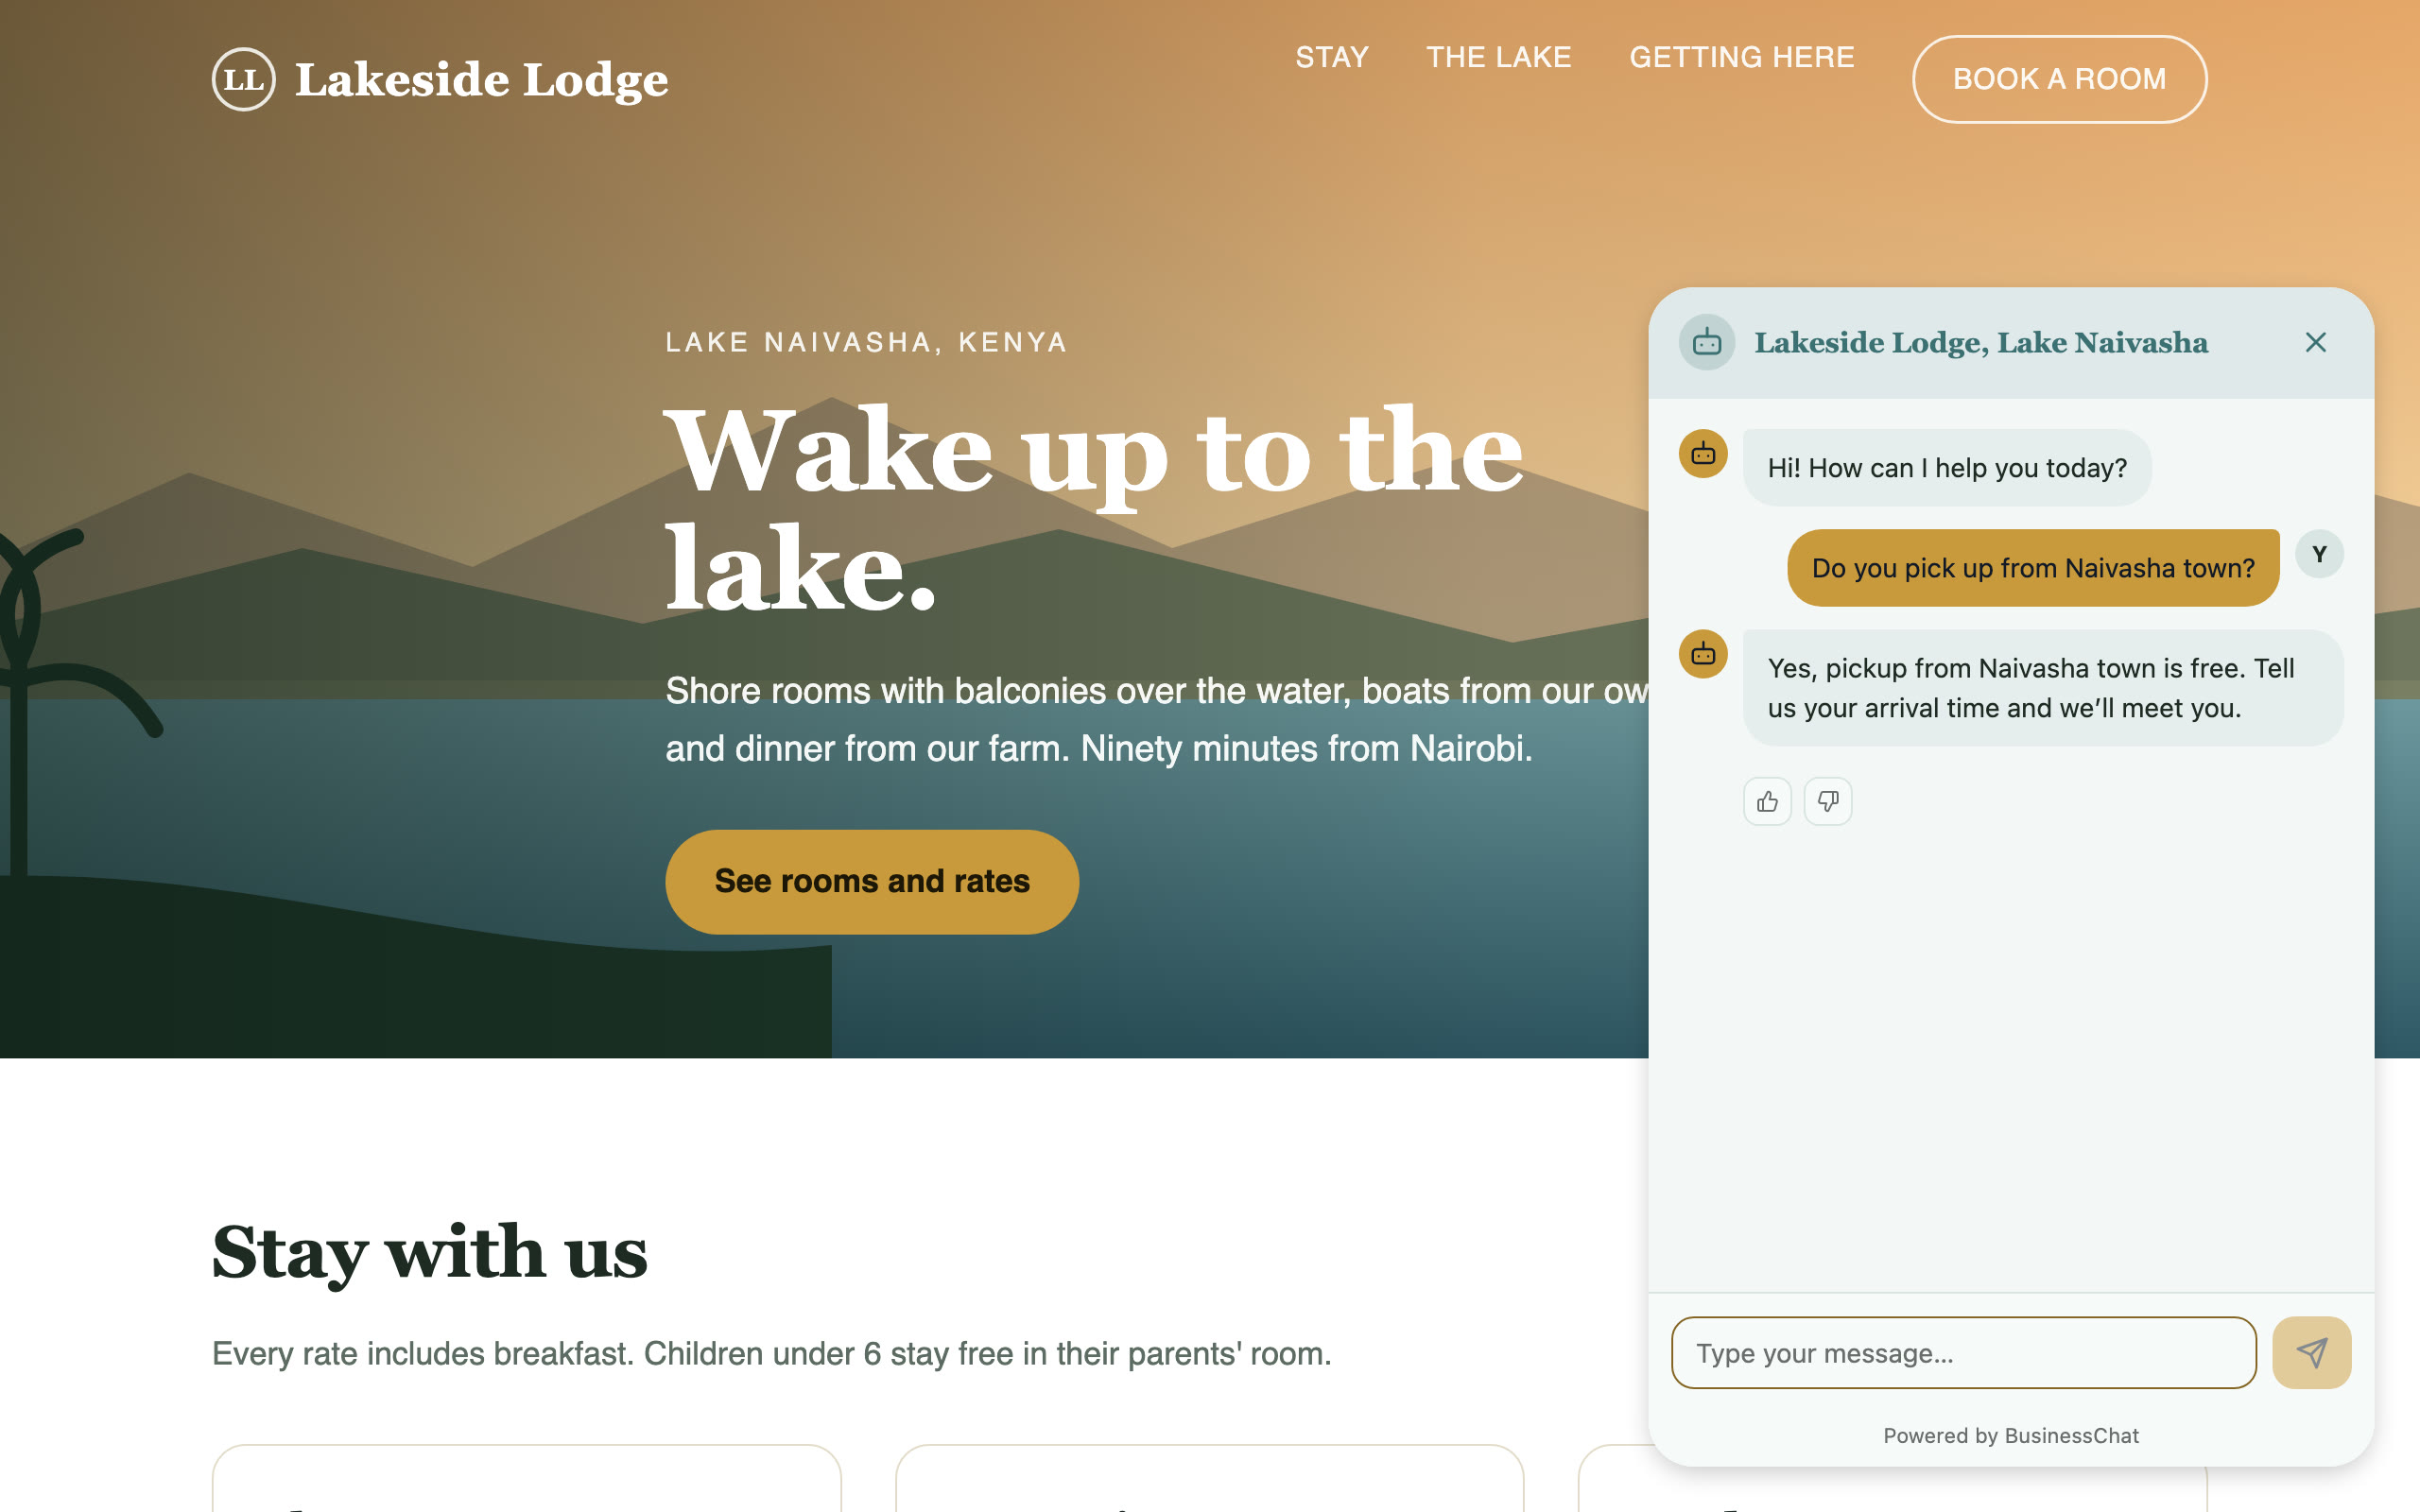
If someone else looks after your website, send them the line; it goes in once and shows on every page. Then open your site: the chat button is in the corner.
What it costs
On the free trial you can build one chatbot from your website and ask it 30 questions yourself, which is enough to see whether it knows your business. Putting it live on your website needs a paid plan. The Starter plan is $29 a month (KES 3,499 in Kenya) and covers 2,000 conversations a month, where one conversation is one visitor's chat of up to 20 questions. On Starter the chat window shows a small "Powered by BusinessChat" line; the Growth plan ($79) can hide it.
If you're comparing tools, I put five of them side by side in Chatbase alternatives for small businesses, counted the same way.
Keep it accurate
A chatbot on your website needs a few minutes a week:
- Read the content gaps. Add the missing answers to your website or as a document.
- Reply to follow-ups. Visitors who left their details are waiting in Handoffs, or in your WhatsApp.
- Update it when things change. New prices or new opening hours: change your website, then under Knowledge remove the old copy of that page and add it again, so the chatbot reads the new version.